
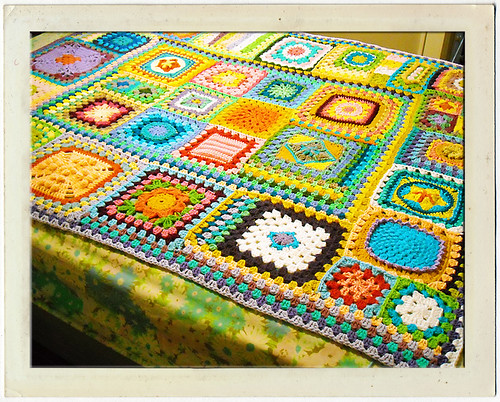
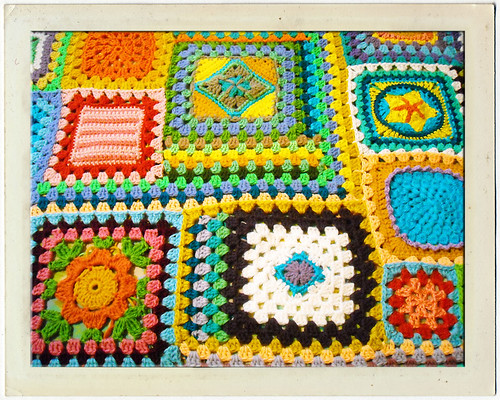
In this tutorial, I'm going to show you an easy way to join squares of different sizes with a 3dc "granny" border. This is the method I came up with when I made my Granny Square Sampler Afghan since the pattern in the book is really vague about how to join it all together.
If you haven't already, you should first familiarize yourself with my tutorial for how to join squares of the same size. This is really just a slight variation on that concept. Once you join a few squares this way, you'll know how to add any square to your sampler afghan! If I can do anything to clarify any of the information that follows, please email me at adaiha@gmail.com.
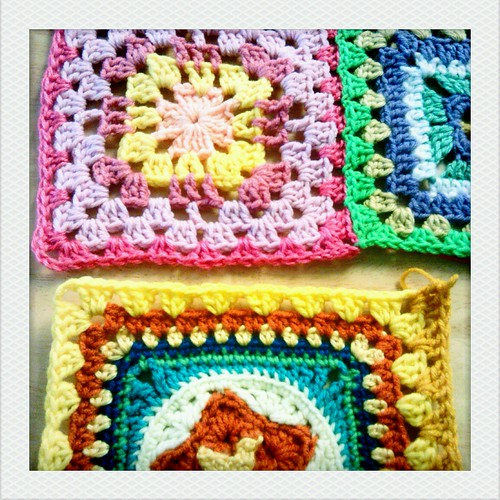
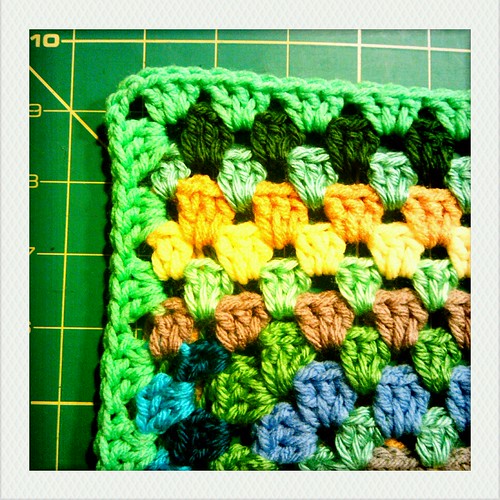
 If you can make a basic granny square, you can do this! To get started, you just need a bunch of squares in assorted sizes. This will go much more quickly if you add a 3dc border to each square before beginning to put them together. It isn't entirely necessarily, but it makes crocheting the final joining round easier. I like to make a big basic granny in a single color to measure each square against to see how many 3dc groups should go on each side to help keep everything even, but I didn't discover this trick until after I made my sampler afghan. It still looks fine! :)
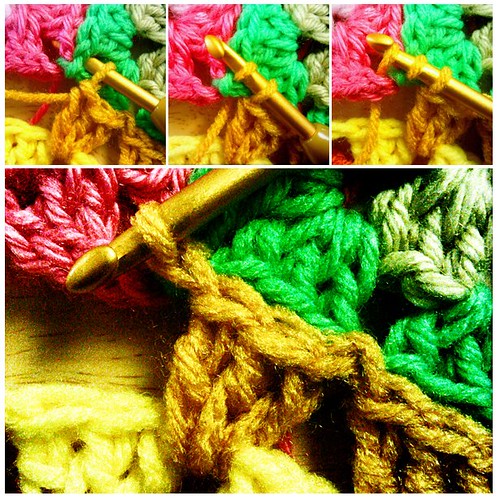
In the photo below, I am trying to join a larger square to an afghan-in-progress. I had already begun to add a new round of 3 dc groups to the square. On the edge where the bottom square will attach to the bigger piece, in the corner work [3dc, ch 1, sl st to the spot where you wish to join the square, ch 1, 3dc]. Continue working 3dc in the next space on the bottom square and slip stitch into the next space on the top piece.
If you haven't already, you should first familiarize yourself with my tutorial for how to join squares of the same size. This is really just a slight variation on that concept. Once you join a few squares this way, you'll know how to add any square to your sampler afghan! If I can do anything to clarify any of the information that follows, please email me at adaiha@gmail.com.
 If you can make a basic granny square, you can do this! To get started, you just need a bunch of squares in assorted sizes. This will go much more quickly if you add a 3dc border to each square before beginning to put them together. It isn't entirely necessarily, but it makes crocheting the final joining round easier. I like to make a big basic granny in a single color to measure each square against to see how many 3dc groups should go on each side to help keep everything even, but I didn't discover this trick until after I made my sampler afghan. It still looks fine! :)
In the photo below, I am trying to join a larger square to an afghan-in-progress. I had already begun to add a new round of 3 dc groups to the square. On the edge where the bottom square will attach to the bigger piece, in the corner work [3dc, ch 1, sl st to the spot where you wish to join the square, ch 1, 3dc]. Continue working 3dc in the next space on the bottom square and slip stitch into the next space on the top piece.
Hint: If you want to make the left edges square up in a situation like this and don't know where to make your first join, here's how to figure it out. The square I am joining has nine spaces along each side, so there will be nine 3 dc groups along each side in my final round here. The starting point on the larger piece above will need to be after the ninth cluster in the tenth space. You'll always want to count one extra space on the part you are joining to. You do not have to make the outside edges of your piece line up because you can fill in any gaps with rows later.
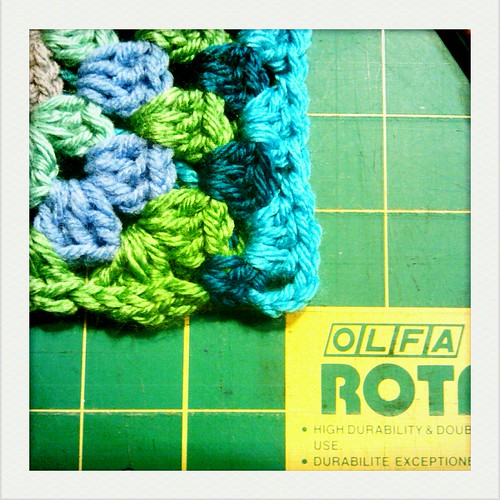
When you get to a place on the larger piece where two corners meet (like below where the green and pink meet), you need to slip stitch together both of the corners. Begin by inserting your hook into the space on the first corner and draw up a loop; next, insert your hook into the second corner, draw up another loop and pull it through the other two on your hook.
Continue working 3 dc in the next space, sl st in the next space of the larger piece , 3 dc until you get to the next corner of your joining square. Corners that meet up with existing corners are worked just like in the previous tutorial (*3dc, ch1, sl st into joining space on the larger piece, ch 1, 3dc* OR *3dc, ch 3, 3dc* if the corner of your square extends beyond the edge of the larger piece).
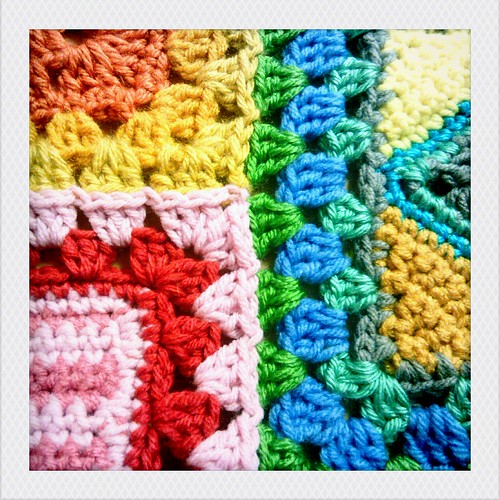
 Sometimes you will not want to go all the way around the corner. The edges you'll get when you work in rows will look like this:

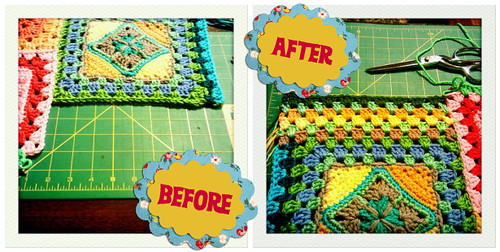
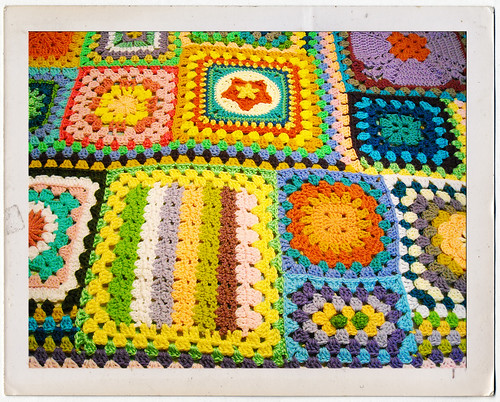
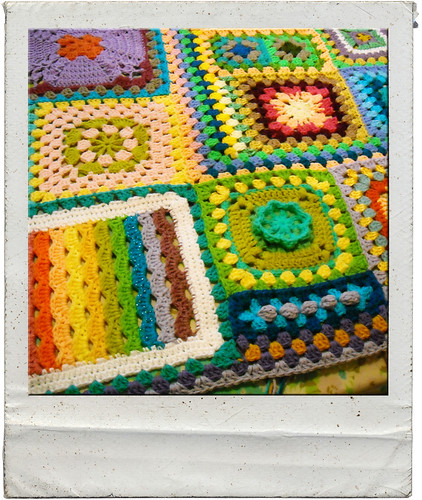
Joining a bunch of odd sized squares will leave you with a few (or even lots!) of gaps to fill in as you can see in the "before" part shown below. You can fill these in with more squares, or you can use rows like I've done here. This is a perfect use for smaller scraps of yarn! The secret to doing this is that for every vertical stripe of 3dc, you will need to work 2 rows to fill in the gap.
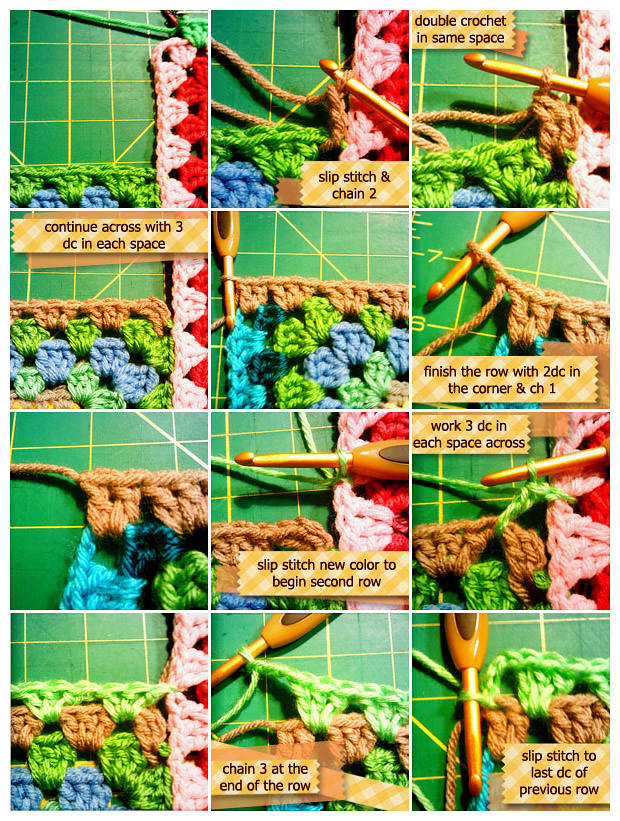
I could explain how to add these rows all day, but I think that showing you will be much clearer. Follow the steps below! Because there are three "clusters" on the pink edge that still need coverage, I had to work six rows (three repeats of the steps below) to fill in the gap. I have tried to make these steps as simple to follow as possible, but if you have any trouble, please let me know!
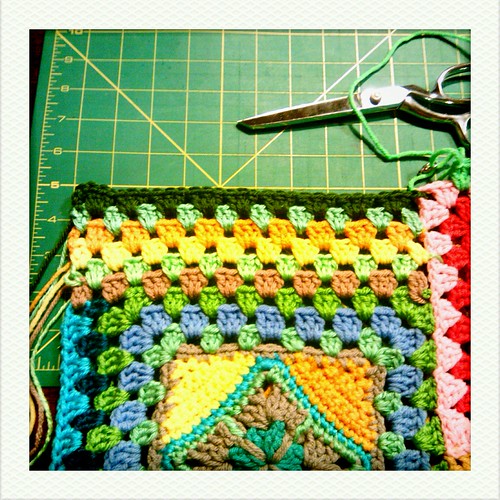
Keep adding rows until you are even with the top row of the adjacent square. If you make sure to add these rows in twos, you will find that the opposite sides of your afghan will have the same number of spaces when you're done.
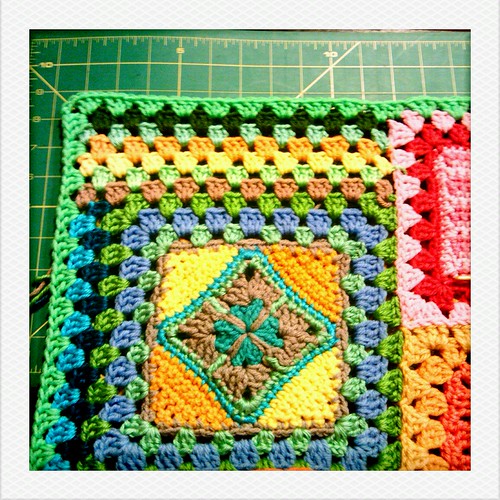
Once your afghan is the size you want and you have filled in all of the gaps, you are ready to work a round all the way around your blanket.
On the parts that are made of rows, you will treat each chain space along the edge as you would a space between 3dc groups.

Thank you for the tutorial. Really help me ^__^
ReplyDeleteThanx for the tuto, very clever!!
ReplyDeleteEsther.
You make it look so easy! I'm almost motivated to get back to my granny a day project. It has been sorely neglected!
ReplyDeleteAwesome! Thanks for the tutorial! Now if only I could figure out how to fill out hexagons into squares or rectangles...Beautiful photos by the way!!!
ReplyDeleteMuchas gracias por el tuto
ReplyDeletela manta se ve magnífica!!!!
un beso para ti ♥♥♥,
Thank you for this, I am slowly trying to get my head round it..lol its nice to come back and see the pictures!.
ReplyDeleteThe finished article is lovely!
Thank you
Jilly x
i made a 1/2 granny sq shawl and would like to put a border on using whole granny sqs, any idea how i can do it ???? thanks, Suzi
ReplyDelete